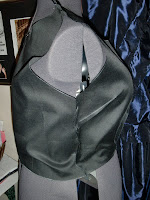
When I saw this come down the runway on the finale of this season's Project Runway, I fell in love!
It's a creation by the winner, Michelle Lesniak Franklin and her entire line was very Steampunk inspired. So, seeing as I had just purchased my tickets to TeslaCon (will be my first time attending), I knew I was going to need some new outfits, so I decided this would be a great opportunity to advance my non-existent patterning skills.
This is the preliminary sketch I made while watching the show:
This is the pattern I purchased for a starting point based on the above sketch:
This is the revised sketch after downloading every available picture I could find:
This is when I realized would be learning a LOT more about pattern alterations. The pattern above was just 2 pieces for the dress.
Using a bed sheet purchased from the thrift store I first converted the front piece to "cut on fold" so there would not be a center front seam. The back I eventually left to be cut as 2 pieces so I can put a zipper in once I make the top fitted enough so that it can't just be slipped over the head. Going through my reference photos, I figured out where to cut the pattern to create the seams
I moved the side bodice dart up little and angled it differently and then added an under-bust dart to make the bodice more form fitting and create the front bodice seams I could see on the photo. (there are no pictures of what the dress looks like without the top vest so it was just an educated guess that they are dart and not princess seams)
Mock up of the bodice:
Adjustments to the initial pattern as I progressed:
Starting to figure out the pleats on the upper skirt:
Added the lower skirt:
(I've been using up what was once my quilt fabric stash.)
Continuing on to the sleeve:
I used the sleeve from this pattern that I plan on using for another re-creation once I finish this one:
After doing the test run, I need to lengthen it by 2 inches to get the cuff to start right at my wrist instead of ending there like on the pattern. I measured around my wrist and around where I want the cuff to end (about 1/2 way down my hand) and cut the sides of the cuff pattern. The non-doubled over width of the cuff is almost perfect once I take the seam allowance into account. I just have to remember that the cuff opening needs to be on the top side of my hand and not lined up with sleeve seam. I really like the way the sleeve is turning out. It has just a little bit of gathering at the cap. I will also need to widen the shoulders of the dress just a little bit so that it's not quite so wide-necked.
So, now I just need to make a fabric selection for the main portion of the dress and then figure out the over-vest. Other things I need to not forget about when putting the final garment together:
- Don't forget to lengthen the sleeve
- Don't forget to widen the shoulders (and add seam allowance)
- Interfacing and lining on the bodice.
- Test transparency of main skirt fabric. flat line if needed
- Angle and trim more from front to back
- Practice seam finishes, the back seams will be visible, make them look nice.
- Invisible zipper on dress, exposed zipper on over-vest.
- Make a small purse to attach like original garment. Do this instead of worrying about making pockets; pockets might ruin the lines of the dress.
- Don't make sharply pressed pleats, trying flattening them by hand.
- Don't forget to mark on the mock up where all the pleat folds are.


No comments:
Post a Comment