Tuesday, May 6, 2014

HSF14: #8 UFO or PHD

The Challenge: UFO or PHD
Fabric: Cotton
Pattern:  J.P. Ryan Pet-en-l'air
Year: mid 18th century
Notions: thread, boning, grommets, twill tape
How historically accurate is it? As good as I can get. I don't hand stitch eyelets, ever. I did minimal hand stitching. I plan on removing the machine stitched hem and re-doing it by hand like I normally would but I was in a time crunch on this and still didn't get it finished until 4 days after the deadline.
Hours to complete: unknown
First worn: Will be worn Memorial Day Weekend at the Chestertown Tea Party Festival in Chestertown, MD
Total cost: Have not calculated yet, have to find a couple of receipts. I probably don't want to know though.

This is mainly going to be a picture post because I don't have much to say other than this is probably the hardest pattern I have ever made. I think the directions could be written a little better as several parts were very confusing. This Pet-en-l'air had been sitting in my sewing pile as a half done mock up for several months. I had to get on making it because it had to be done in time for Memorial day so this Challenge was the perfect excuse to get it done!

The Lining - Front


The Lining - Back
What I learned with the lining: I made it inside out. Oh well! Couple of minor adjustments to make sure the edges don't show and it will be fine. Now I know for next time. Mid-making of this I swore I would never make it again, but then when It was 95% done and sitting on my dress form, I could see my Rococo Punk (Georgian era Steampunk) outfit. So, at least now I know how it all goes together.

The "what is this, something from the 1970s?" period.

I didn't not take any pictures between this and getting done. Oops!

Finished Front
Pay no attention to the scrubs blue petticoat. I had first thought I wanted a light blue petticoat but half way through the Pet I decided I wanted navy blue instead, so the light below becomes an under petticoat.

Side view.

Finished back.
Oh how I love a saque back!!!

Close-up of front.
Still have to figure out how i want to trim the stomacher, or if I even want to. It might all have to wait for another day when I can add more decorative trim to the whole thing.

Close-up of the top of the back pleats.
Sleeve - outer flounce.
Sleeve - inner flounce.
Underneath the back.

Ta-Daaaaaaa!

Sunday, April 13, 2014

HSF14: #7 Tops and Toes


The Challenge: Tops and Toes 
Fabric: Cotton scraps 
Pattern: none, but this page got me the basic info I needed: 18th Century Hats 
Year: 18th century 
Notions: straw hat, thread, satin ribbons 
How historically accurate is it? Not too shabby, I think. 
Hours to complete: Several 
First worn: Not yet, made to go with a dress for Memorial Day 
Total cost: Less than $15


For this challenge, I decided to tackle the hat I want to go with my 18th. c. Pet-en-l'Air I will be making to wear when I go to visit my mom over Memorial Day weekend in Chestertown, MD for the annual Chestertown Tea Party Festival. She's talked about me making her a dress to wear for a few years and I decided that I would finally get to it and while I was at it, I would make something for myself as well and take a vacation day and go see what this festival is all about. ... Also known as... a reason to get dressed up!

I am going to write this tutorial style as my translation of the above blog post from Couture Mayah.

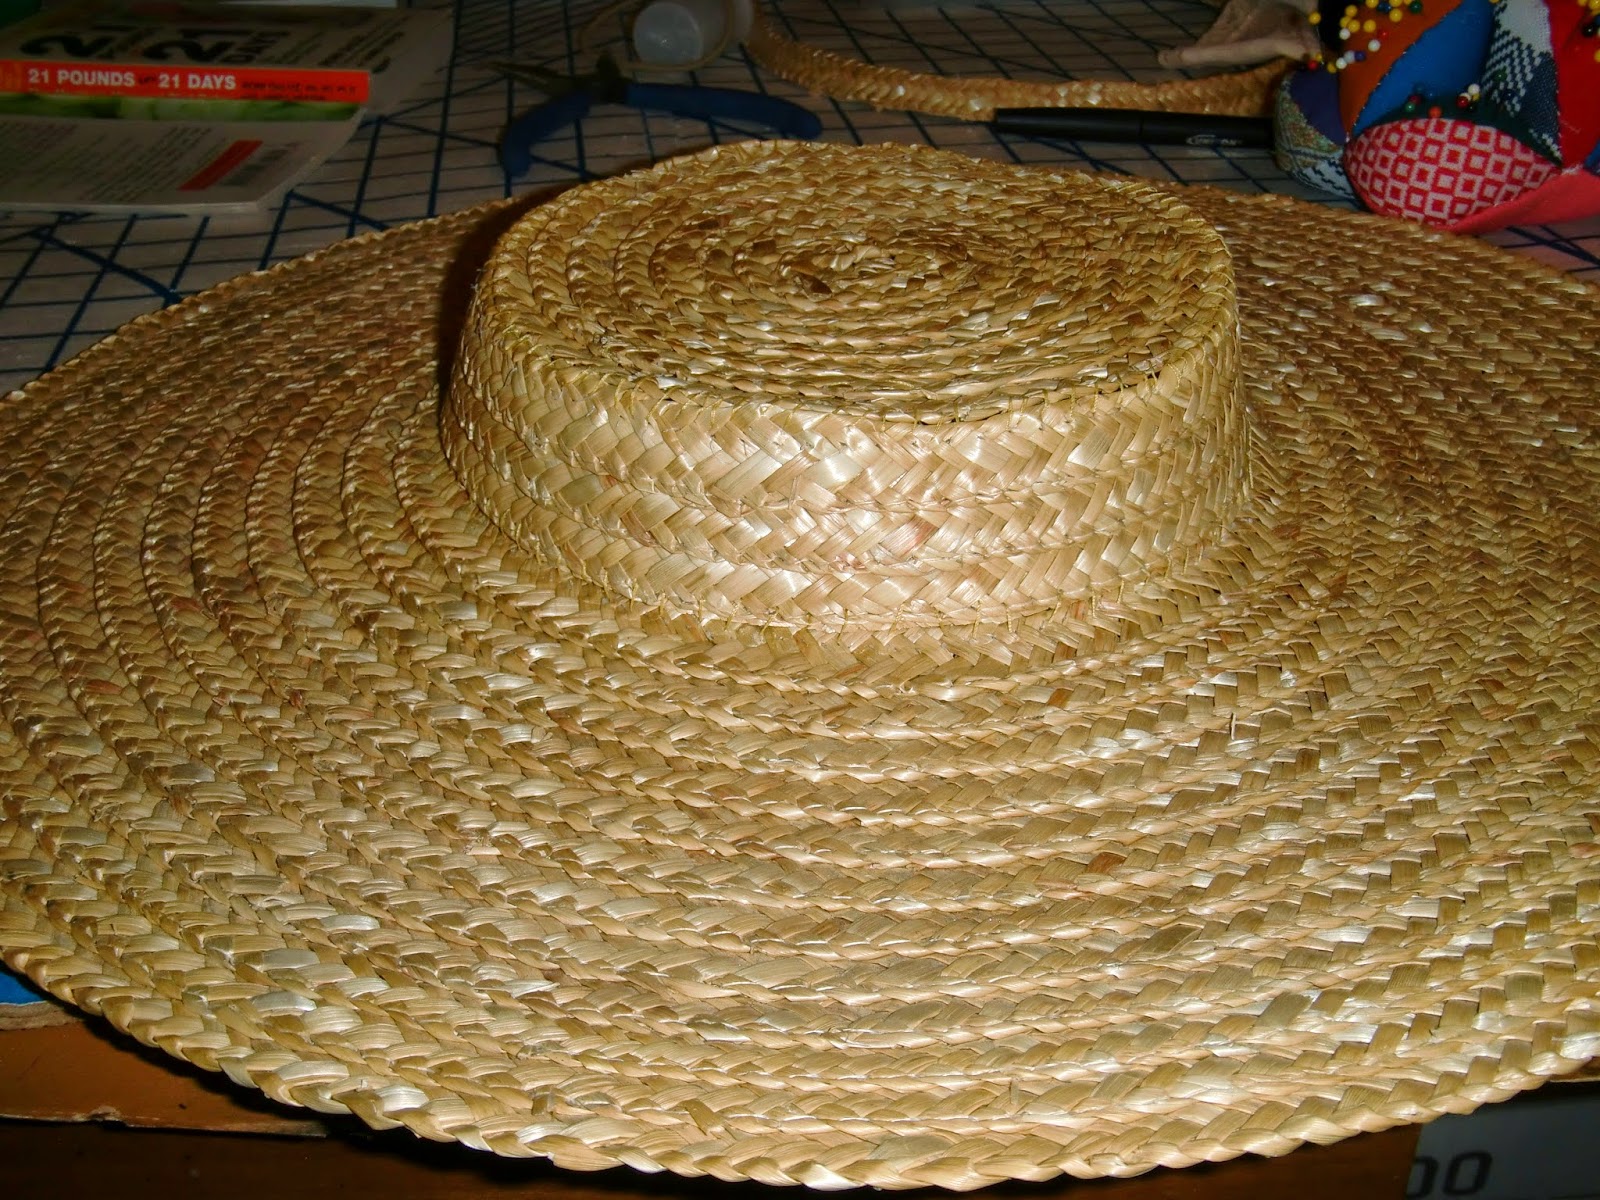
I started with a basic straw hat that you can get just about anywhere.


Step 1: Remove crown from brim.


Step 2: Iron brim flat.


Step 3: Remove top of crown.


Step 4: Shorten crown to desired height. You'll have all these pieces when you're done.


Step 5: Either add on some braid you removed to make the opening smaller or curse yourself for removing the crown in the first place because you ended up sewing back on. (I wish I had made the opening a bit smaller but I think with a period appropriate hair style it will be OK).


A close up of my stitching. I used a yellowing thread I had on had and it was close enough in color to hat to work, but it doesn't matter too much if you are going to cover this area with trim.


Because I didn't add to the opening of the brim, I ended up having to add to the top of the crown so it would fit.


Step 6: Add extra braid on to the crown.


Step 7: It's easiest to stitch the crown on if you first pin it in place.


Success!!! A low-crown hat!!! Time for the fun part... decoration!


Step 8: I did a pinked trim. I ran a gathering stitch down the middle and then gathered it to the amount of scrunchiness I had in my head.


Step 9: Stitch 1st layer of trim on to hat. I very carefully stitched this so that the stitches did not go all the way through the hat so that they would not show on the underside.


Step 10: Add 2nd layer of trim. I chose a blue that was in the pattern of my dress fabric. It just so happens it was also the same color blue that I used for hair ribbon on my Regency dress so I got to use up the leftovers and then purchase 1 more spool to get it all done. On the outer row I only stitched through the white trim but on the inner row I had to go all the way through the hat because of the angle.


Yay trim!!


Step 11: I tacked the back up in the manner that appealed to me the most. I used a heavy upholstery thread so it would not easily break.


Step 12: Make some bows by any means you know how (or curse me for forgetting to take pictures of that step). I made a large bow for the back and 2 small bows for the sides. The blue ribbon looked nice on the bows but I really wanted bring in more of the red/burgundy of the print so I ended up buying a burgundy ribbon to use instead. Tack the bows into place where you want them. I didn't use too many stitches to do this so that I could change them out in the future if I wanted.


Ta-Daaaaa!!!!!!! Hat!


Step 12: When you finally remember that you need a method for the hat to stay on your head, get some wide ribbon and stitch a length on each side of the underside of the brim of the hat where it meets the crown. I used a 1 yard length of 1.5" wide white satin ribbon.

Then, when you're all done with your glorious hat and you're still on that new hat high.... make a matching hat for your mom's dog and a mob cap for your mom, while keeping in mind that you're mom is jealous of your hat and you should probably make her a big one too.

Monday, March 31, 2014

HSF14 #6: Fairytale

http://thedreamstress.com/the-historical-sew-fortnightly-2014/


The Challenge: Fairytale. 
Fabric: Cotton bed sheet 
Pattern:  Sense and Sensibility - The Elegant Lady's Closet. Drawstring Dress. 
Year:  1790s 
Notions: thread 
How historically accurate is it? Not too bad considering it's made from a bed sheet and machine stitch. The pattern it's made from is historically accurate and for my first ever Regency gown, I think I did pretty good (the stays are another story however). 
Hours to complete: I think I had it done in about a week or so with the here-and-there way I sew. 
First worn: March 22, 2014 at the Regency Exhibition Ball in Lansing, MI 
Total cost:  Believe it or not.. $5.47. I got the sheet at the thrift store for $3.98 (1 full or queen top sheet and 1 pillowcase) and $1.49 for the little flower trim... that I forgot to take a picture of, sorry.

This was my very first go at Regency era. I have never had much interest in it bu my friend Jennilee of Miss Leah Wilde's Sewing Blog found the Regency Exhibition Ball online somehow and we decided we would make the 4 hour drive to Lansing, MI to give it a try. We had a great time and will definitely be going back next year. The dancing was fun and easy to pick up on with the instruction, the people were friendly and we did not end up being the "country cousins" we thought we might be. I know what I want to do for next year thanks to all my movie watching to get into the right mind set. For weeks I watched everything Netflix had for Pride and Prejudice, Sense and Sensibility, Jane Eyre and Emma...... AND I discovered one of my new favorite movies... Austenland!!! I've seen it at least 1o times in the past month and it's my Friday evening routine now.

Now on to the challenge. I didn't really choose a fairytale and didn't think I would be completing anything for this one because I couldn't find anything on my list that fit. But while I was working on the dress it hit me... Cinderella. The blue that is in the dress is pretty close to Cinderella Blue and either a.) what would the mice had made her dress out of that they could have gotten easily? or b.) what if the fairy godmother didn't have  magic and maybe she was... I don't know, another servant in the house or something like that that knew how to sew? They would have used what they had on hand to make a ball gown. In my case, it was a bed sheet and pillowcase. And I used the magic of electricity to sew that sheet into a dress that I wore to a ball. It's a bit of a stretch I know, but hey, I have a challenge entry!

The Plan.


Check my awesome use of limit fabric! That's the whole bodice (minus sleeves) cut from 1 pillowcase! The scalloped edge and piping was removed and saved and ended up on the sleeves.

 The back panel *just* barely fit!!!!

Inside the bodice, showing the "lining" (this was really awkward to pin in place once it was on).

The bodice after the sleeves are in and the drawstring casing at the top made. I first made the dress with the short poof sleeves but they looked and felt absolutely terrible so I ripped them out and cut the elbow length sleeve instead and one size larger for comfort and had much better success.

Putting in the tabs on the back for the drawstring.

Skirt on and drawstring inserted.

The back before finishing the neckline. I picked out that spot on the left sleeve and fixed it, it looks like the right side now.

The trim added to the bottom of the dress. Sad thing is, if I would have figured out that I could get skirt out of the dress out of the single width of the sheet, I would not have had to take the trim off in the first place (though then there would have been a seam in the trim and with the way I did it, there is not, so that's a plus.)

The finished dress.

What I learned from this project: This style Regency dress was not made for my body type or maybe it just needs to be a different color, I never white anything with this much white.

Overall though, the dress was very easy to make in comparison to my other projects. and I might try and make the cross front dress from the pattern if I find another sheet I like at the thrift store... or maybe some curtains :)

Saturday, March 8, 2014

HSF14: #5 Bodice


The Challenge: Bodice
Fabric: 2 yards of Taffeta
Pattern: Truly Victorian: TV420: 1879 Cuirass Bodice with Evening Options 
Year: 1879 
Notions: Thread, boning, trim, button forms 
How historically accurate is it? As close as I could get. Machine stitched including button holes. 
Hours to complete: I don't keep track. On and off for about a week. 
First worn: Broken Hearts Masquerade Ball on Valentine's Day
Total cost: $28.75 ($8 for taffeta + $7.49 for interlining +  $2.50 for lining + $2.82 for pearl trim + $5.97 for button forms +$1.97 for thread)


This time last year I made an 1870s bodice, so  I wasn't as stressed making this as I was making the other. The only daunting task I had in front of me was my plan for this to be a button bodice, where as I did hooks and eyes last year.

As usual, mock up first...
Fitting Front
Fitting Back
I had to take in the top of the back about a half of an inch. I probably could have stood to have taken in the shoulder seem just a tad but it ended up working out well enough.

Cutting everything out is my least favorite part. I wish I had a helper to do all the cutting!


I like it much better when it a starts taking shape.

Inside
Outside
Boning day is always exciting! Means I'm almost done!


Boning in their casing stitched down to the darts and seams.
 I finally got around to setting in the sleeves after inserting the boning. Things got a little out of order.


Lining time!!!!

I also decided to do covered buttons instead of buying something ready made.


Not bad for my first time doing these.

Doing all those button holes and making sure they were precisely placed was the most nerve wracking part. Making sure all the buttons got in the right spot was only slightly less so.

Front
Back
Close up of the trim. This is also on the bottom of the skirt.
And finally.... the complete dress!
This was at the annual Broken Hearts Masquerade Ball here in Columbus, OH. This year is fell on Valentines Day which also happens to be my birthday!

As you can see from the picture, the petticoat tends to peek out from under the skirt at the back edges. I haven't figured out a solution for it yet beside loosening the cinch of the fan tail. Eventually I plan on putting a large fabric bow on the skirt to better conceal the cinch and then I should be able to loosen it a bit more. I will have to try and get more angles of the whole ensemble the next time I wear it, which will be in April for Steampunk Empire Symposium. Also, future plans down the line for this dress include making a matching day bodice and adding more trims to the skirt.

I forgot I had taken this picture of the back on the dress form: